28th November 2006
IMPORTANT INFORMATION
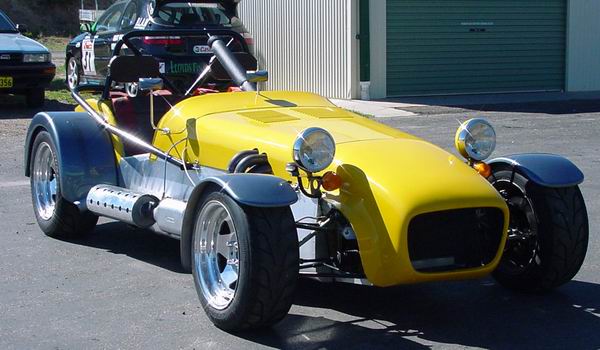
Many people have confused the car featured in the page with the PRB widebody hybrid model introduced in 2006. My PRB was built to assess the S2000 driveline for the next generation of PRB and used the PRB composite chassis. The fitting issues I encountered such as the requirement for dry sumping the motor and reduced passenger footwell were addressed in the larger PRB widebody design. The PRB widebody hybrid does not require dry sumping and has significantly more footwell room and seat width than my clubman. Dry sumping is not a prerequisite for the PRB widebody hybrid. For more information on the PRB widebody hybrid see www.prbaustralia.com.au
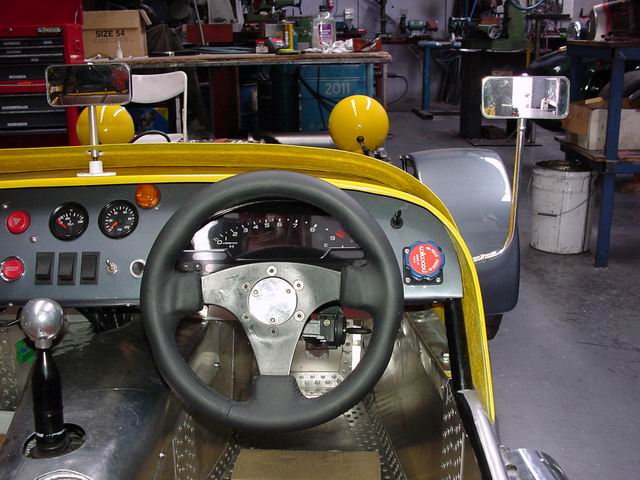
I wanted to match the best clubman chassis with the best production engine I could lay my hands on. It didnt take long to choose the Honda F20C from the S2000. This 9000rpm screamer with 245hp in standard trim has more power than the full works versions of the Toyota 4age I had been using. The S2000 also had a 6 speed gearbox, differential with a good ratio and LSD for circuit racing so I decided to use all this gear. To road register my car I have to use an emissions compliant engine so I've retained the S2000 wiring loom and computer (with circuits such as the radio, air conditioning and ABS that I wont use removed) and even the instrument panel.
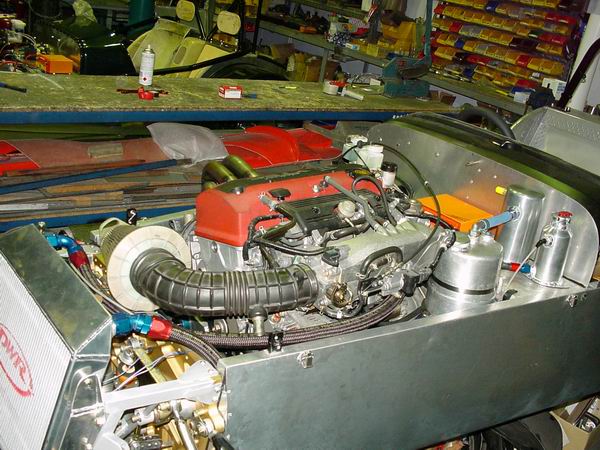
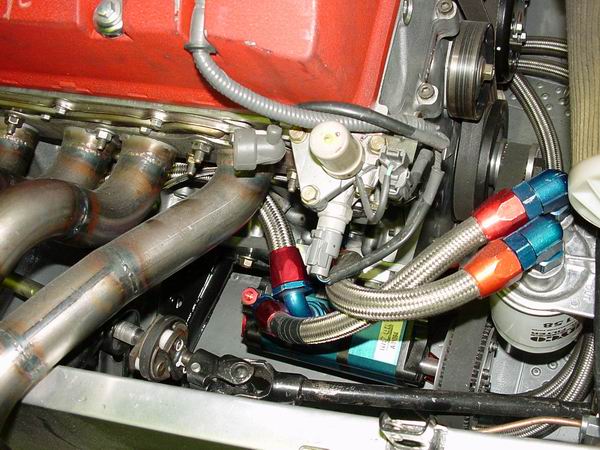
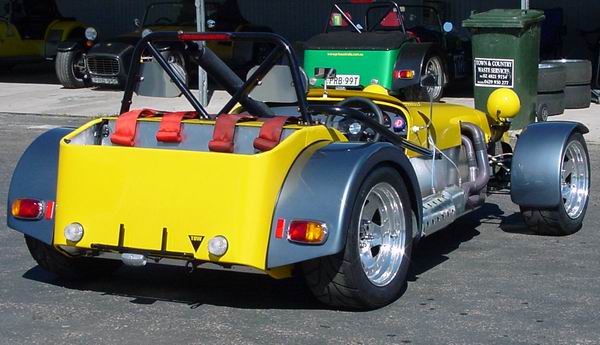
The engine has been dry sumped to avoid a bonnet hump and to protect it from possible oil surge as the PRB can develop incredible G forces. The propshaft has been shortened to about 12 inches and the differential matched to the MX5 uprights used in the PRB with custom halfshafts and some decent 6 ball inner CV's. The S2000 ones were already pitting at 30,000km.
The car is now registered and just needs the interior trimmed to finish it off.

The project
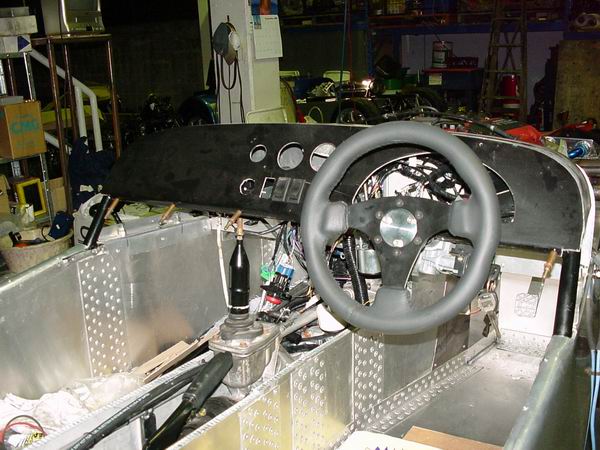
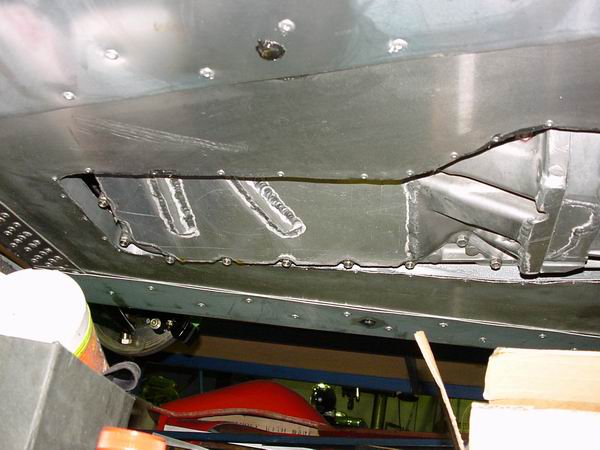
Fitting the S2000 driveline to the PRB composite chassis was a challenge. The PRB composite chassis was designed around the 4a-ge engine and T50 gearbox. These are much smaller than the F20C. The Honda engine is much taller and the gearbox is huge. The normal PRB chassis was used, but I customised the transmission tunnel, footwells and pedal positions to fit the engine. I also wanted to avoid a hump in the bonnet so a dry sump conversion was on the cards from the start. I also had to mill material off the bottom of the bellhousing and gearbox to minimise the amount of components below the vehicles floor.
Finding a donor car took some time. I managed to find a damaged local car that handn't been dismantled. I negotiated to remove the parts I required myself. This helped immensely as I knew how everything had to go back together. I also copied the vital pages from a Honda workshop manual I borrowed from a local club member. This included assembly drawings and most importantly the electrical system.
The build and assembly was straightforward enough. The challenging parts were getting the wiring sorted and the dry sump system. Wiring wise, I started with the S2000 wiring loom and carefully removed all circuits that I didnt need. I then tidied up the loom and shortened it considerably to fit under my dash. I had to modify the main fusebox so the two headlamp relays would switch the high/low beams. In the S2000 the relays switch the left/right HID lamps and the high beam is a separate circuit.
On the track
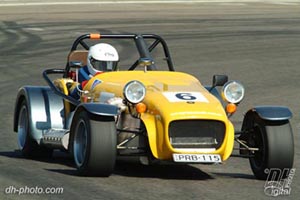
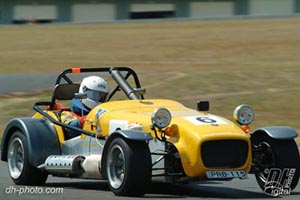
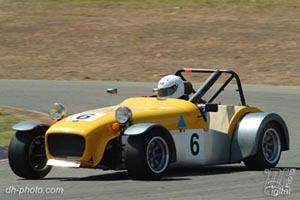
I raced my car in a 1 hour enduro last weekend and its everything I was building the car for. With a stock F20C engine running pump fuel I was able to qualify in second place on the grid ( of 18 cars) only a few tenths behind pole. The car on pole had a highly developed 4age 1900cc race engine. If it wasnt for time lost attending to fuel spilling from the charcoal canister at a pit stop I would have won the race. Not bad for the cars first race meeting.
The Honda powerplant and gearbox and a fantastic match for a clubman. It sounds fantastic when on VTEC and accelerates hard in every gear. I'm amazed at how well the production gearbox handles high rpm shifts.
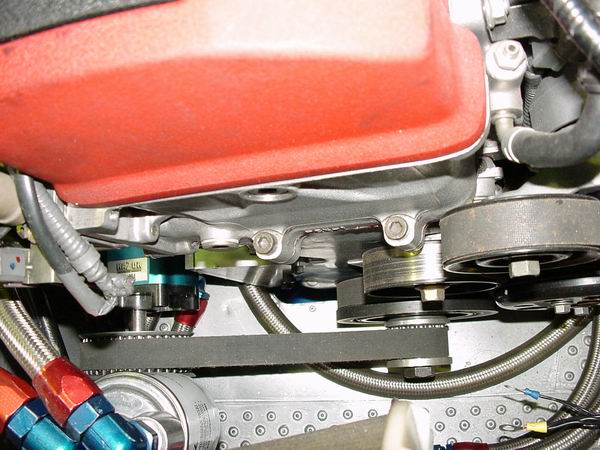
Dry sumping the F20C
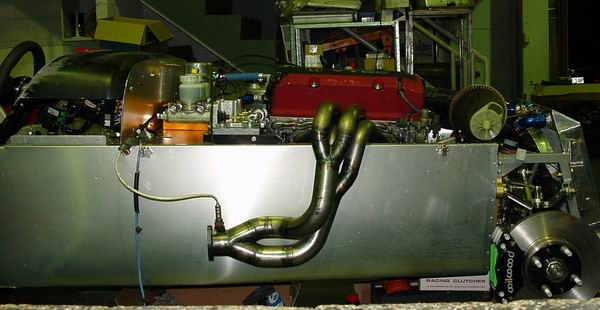
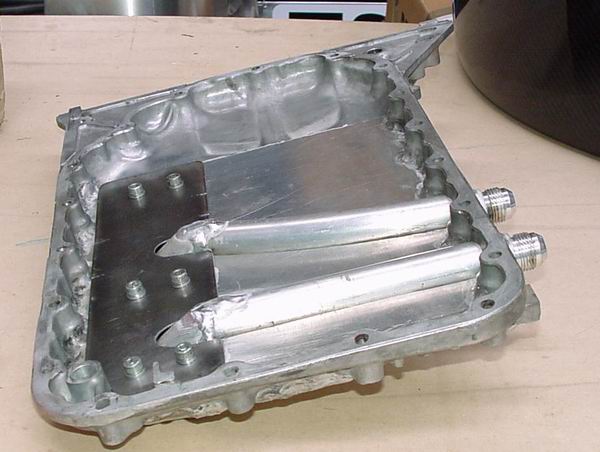
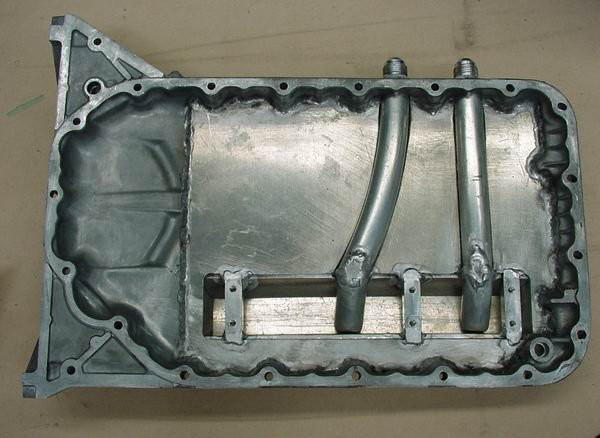
Reducing the height of the F20C required dry sumping. This wasnt as straightforward as I expected. I cut down the stock sump TIG welding a plate to the bottom. I had to play around with the scavenge pickups to clear oil efficiently. Pump wise I used a Razor pump on a bracket I bolted to the side of the motor. Drive came from a pulley I mounted on the front crank pulley. I sized the pump on what you would normally use on a 4 cylinder motor.
The first day uncovered some problems. At high revs after the VTEC cut in the oil pressure would drop off alarmingly. Fortunately I had a 30psi warning light so I buttoned off as soon as I saw the light. After a lot of mucking around I worked out that the pump simply wasnt pumping enough oil to feed the engine under VTEC. The standard oil pump moves approx 100 litres/minute at full noise which was more than double what my pump could supply. When the VTEC engaged all the hydralic pistons that hold the rockers on the high lift position work together to form a giant oil leak into the engine. I upgraded my pump from a 1inch pressure stage to a whopping 1.875 inch stage. This is an enormous pump, enough for a V12 motor.
Track testing proved that the low pressure problem had been fixed, but the large pump had introduced another problem. When not on VTEC the pressure relief valve in the pump was unable to cope with the enourmous flow. With cold oil I had to keep the revs down to avoid 150psi oil pressure. To overcome this I disabled the relief valve in the pump and installed a Peterson oil systems external pressure regulator. This fixed the problem and kept the oil pressure under control. I could finally drive the car without watching the oil pressure gauge and warning lights.
I've attached some pictures of the sump and belt setup.


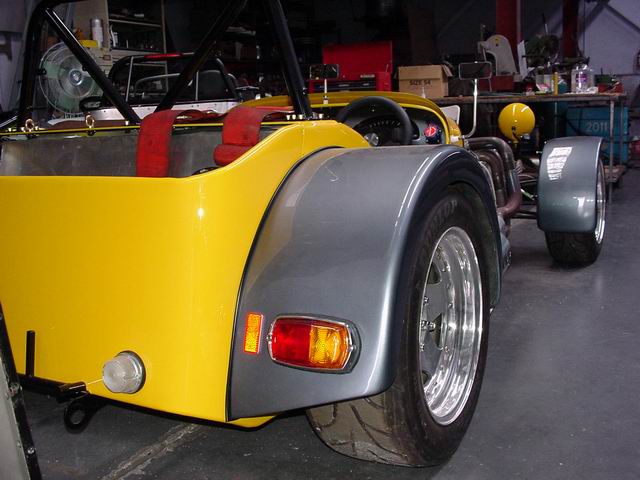
Build pictures
Heres a bunch of pictures of the car being built